While my mom was here helping me get used to life with two little boys, she also helped me make a few fun decorations for my big boy’s 2nd birthday party. One such decoration was this super cute, and very easy to make
Birthday Celebration Wreath
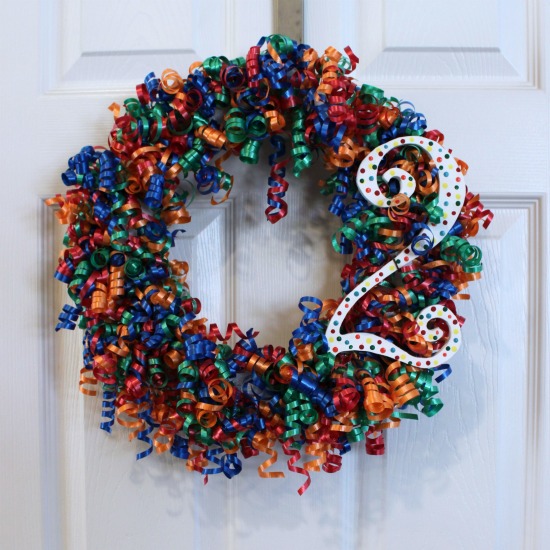
The best part?! You can totally customize it to meet your party’s needs as far as color and number go. You could even add the birthday boy or girl’s name to the wreath as well.
To make a birthday celebration wreath, you’ll need:
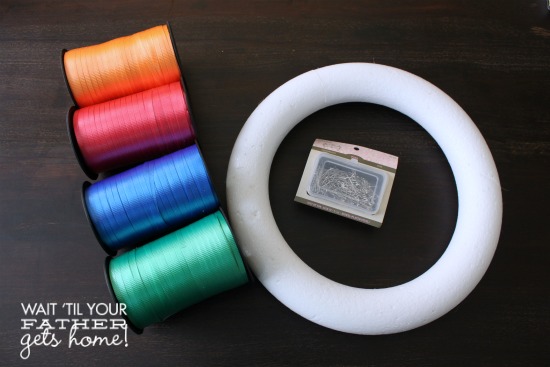
curling ribbon in your party colors
straight pins
wooden number or shape or letters to spell out a name
foam wreath form
scissors
and…
patience
Note: I found my curling ribbon at Michael’s for I think about $3 each. If you get these big spools {found in their party area} you will have a ton left over. I used the ribbon for most of the decor for the rest of the party too. Trust me, you’ll have plenty!!
To get started, grab about 12 inches of each color ribbon and cut.
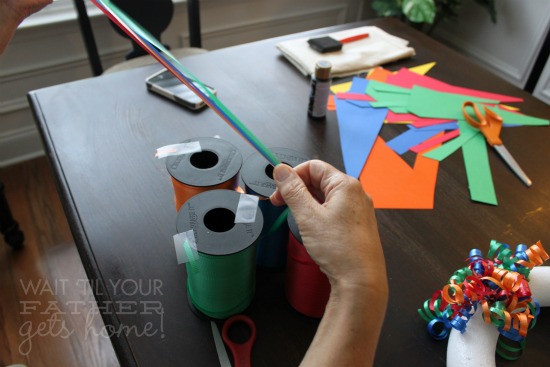
Tie a knot with all colors in the center of your 12 inches.
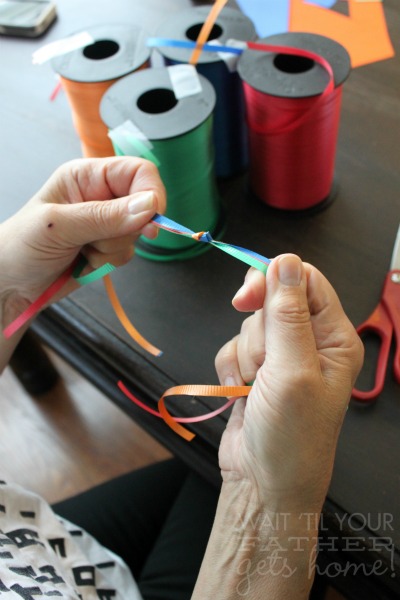
Using scissors, carefully create ribbon curls.
Be careful people, scissors are sharp and they can cut you {Captain Obvious, I know}.
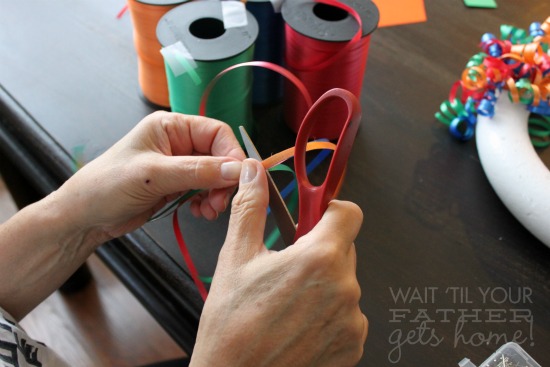
Stick a straight pin through the knot and push it into the wreath form.
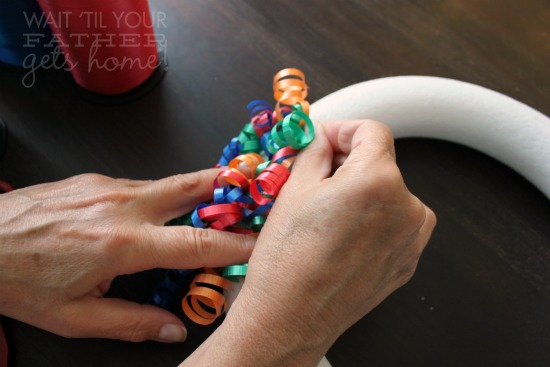
Repeat, repeat, repeat…
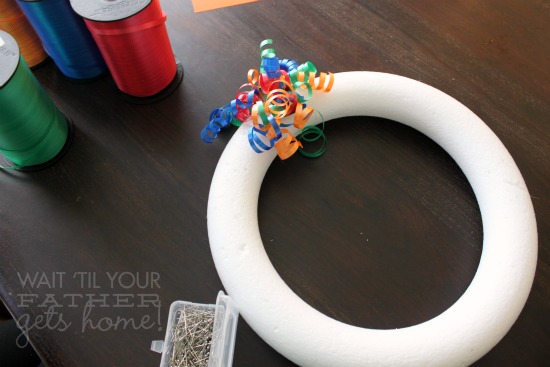
Keep going, you can do it!
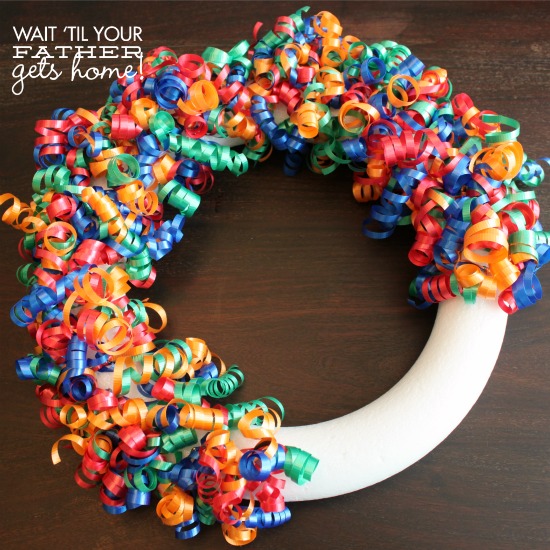
Once the wreath was covered in beautiful, colorful ribbon curls {thanks mom}, paint your wooden embellishment to your liking and attach with floral wire.

This was honestly one of my most favorite things we made for the little guy’s party! And now I have a Birthday Celebration Wreath that I can customize for any future event by simply changing out the wooden embellishment!
Read more about the Car & Truck Birthday party here!

I’ll be linking up at these parties.


This turned out really cute, Meredith! And I love that you don’t need and special supplies to make it.
What size is the wreath ?
Meredith, this wreath is so fun! I absolutely LOVE it….and easy too! My kind of project. Thanks for the inspiration on this Monday! 😀
I love it1 My mom is the curling ribbon queen in my family, she also happens to lack any crafting ability. I’ll have to pass this on to her 🙂
What a cute, cleaver and fun idea! Thanks so much for sharing!
Too cute!!! I am totally using this for Kate’s birthday!
Great tutorial! I pinned! Thanks for sharing!
Very cute!!! It looks so fun, what a great birthday wreath.
This is so cute! I absolutely love it. It looks much easier than pinning a bunch of tiny balloons all over a wreath. We’ll be featuring this over at Someday Crafts tomorrow 🙂
WOW! I love this, it’ so fun and festive! Perfect for birthdays! Found you via TT&J!
Thanks so much! 🙂
I ADORE this wreathe and all the colors, and the small investment!!! But, I would have cut the groups of strands in 15″ pieces ( you said you had a ton left over, so no sense scrimping) and then I’d tie the bunches AROUND the wreathe and continue with the curls. Eliminates one step and no hassle with pins falling out (because the do fall from the styrofoam as they age) and it covers the back!!!! Did I say I love this wreathe???????????
Great idea !!!
So simple it’s brilliant! I love it and can’t wait to make one, too! =) Thanks for sharing.
We have 10 birthdays from mid Oct. til Christmas at my house. It will be ragged by then if they don’t want to keep it!
Love this idea. To cut alot of the ribbons at once. Put 2 long nails in a cut of wood leaving out inch above the wood either 6 or 12 inches apart. Wrap the ribbon around both nails multiple times. And when done cut through both sides in the center of the nails if 12 inches apart 1 side if 6 inches apart. Old trick from my family’s floral and gift shop. Made many balloons as a kid.