Some links included may be affiliate links. If you choose to purchase by clicking through, thank you so much for supporting my blog.
There are literally a ton of different ways to lesson plan for homeschool. You can use a basic planner, a teacher planner, a printable planner, a digital planner, a spiral notebook, a post-it note per kid/per day, a dry erase board…the sky’s the limit. For me, I prefer a teacher planner that offers a monthly and weekly layout, space for notes, checklists, a good space for a year overview, and some storage pockets or folders included for loose papers.
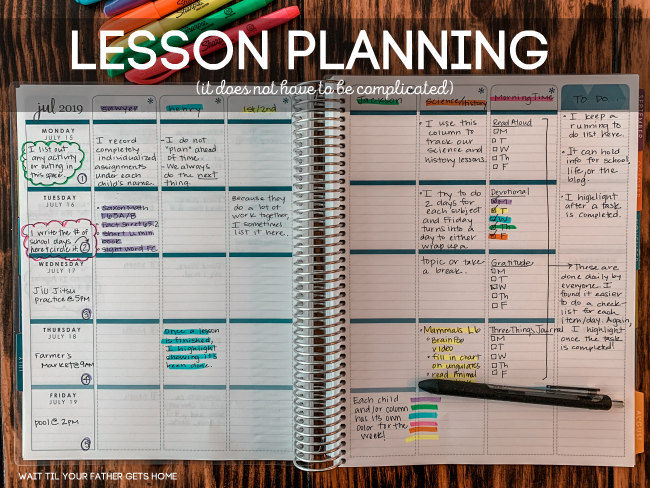
There are two companies that I really have liked over the past several years as a homeschooling mom and former classroom teacher…
Erin Condren Teacher Planners
and
Plum Paper Homeschool Planners
This year, I’m using a 2020-2021 EC Teacher Planner. Some Target’s actually are now carrying EC Teacher planners in store.
Curriculum Lists
I first find a good grid or notebook style spread in the planner to list out my intended curriculum picks for each child. Sometimes this ends up changing. Who am I kidding? It always changes and grows as the year develops. Pictured you’ll see my plan for our previous school year.
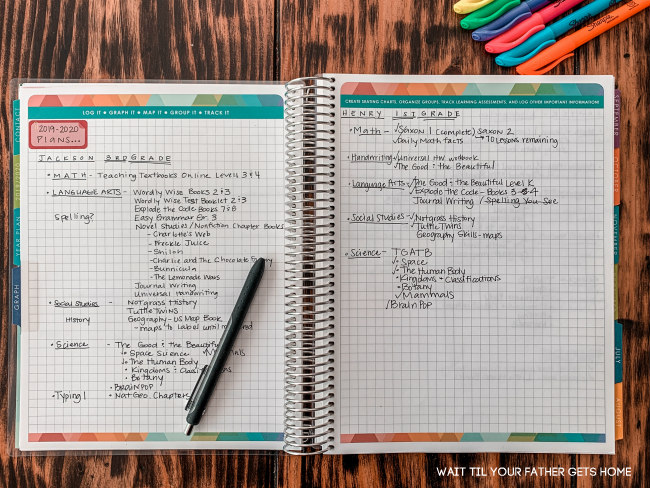
You’ll notice I take care of Math and Language Arts first on the list. I like to get those subjects squared away and fill in our science, history, and other topics based off of those two core subject areas. I’ve gotten many phone calls, texts, emails, and dm’s these past couple weeks asking what curriculum to pick. My advice? Start with math and language arts, then fill it in with topics that interest your kids. Use resources like Netflix, Prime Video, and now Disney+ for documentaries and subject specific items. Check out library books that are of interest to your kids (many libraries are offering an online reservation system and curbside pickup).
With the exception of Math and Language Arts, everything else is pretty much done together as a family. My now 1st grader will be participating in the same science and history lessons as my 4th grader. Learning does not have to be separate. And trust me when I say this: YOU DO NOT HAVE ENOUGH TIME IN THE DAY TO SIT INDIVIDUALLY WITH EACH OF YOUR CHILDREN FOR EVERY SINGLE SUBJECT.
Year at a Glance
Once I’ve got a handle on curriculum and supplies needed, I begin to order. I like to spread this out over the last few months of the current school year and into summer. Then, I roughly map out the specific days we’ll count towards our mandatory 180 days of instruction (a Georgia specific law).
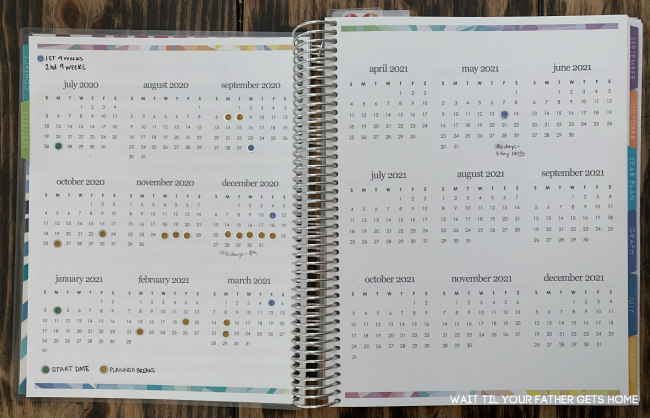
When I submit my Declaration of Intent to Homeschool (DOI), I always use a full calendar year. For example (August 3, 2020 – August 2, 2021). I also PRINT OUT several hard copies to keep in my purse, in the car, in my planner, and one for each child’s grade level binder. I save the DOI as a PDF as well.
As you can see I give us some long weekend breaks here and there during our school year. Essentially, I like to do school pretty solidly, 5 days a week with the occasional 4 day week for 9 weeks at a time. Then, it’s nice to take a long weekend or maybe three days off in a row. This gives the kids a little break, and gives me a chance to clean out binders or old units and get ready for new material. I don’t usually stick to the public school calendar. For those that are homeschooling with the intention of sending your child back to public school in the future, you may want to try to stick to your specific school calendar.
Weekly and Daily Plans
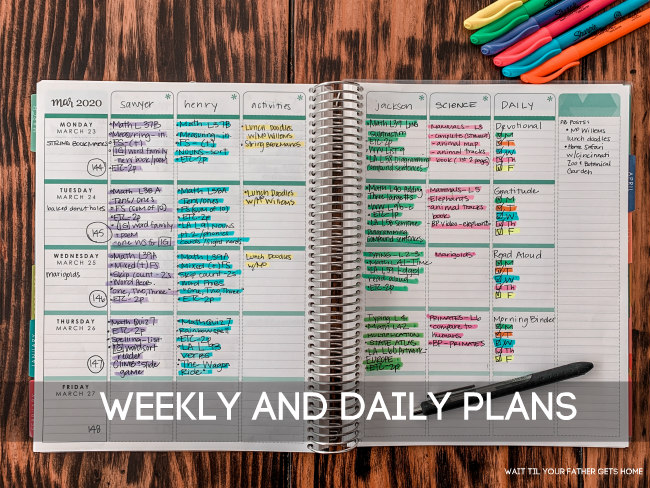
This is a typical weekly layout in my Erin Condren Teacher Planner. Plum Paper planners offer a similar layout (and actually have a few other styles you can choose from within the “guts” of the planner itself).
Each day is pre-dated along the left-hand side of the spread. I use that space to list out any activities for the day (practice, library, errands, etc.) and always write the day of school somewhere in that box. I circle it after we’re done for the day.
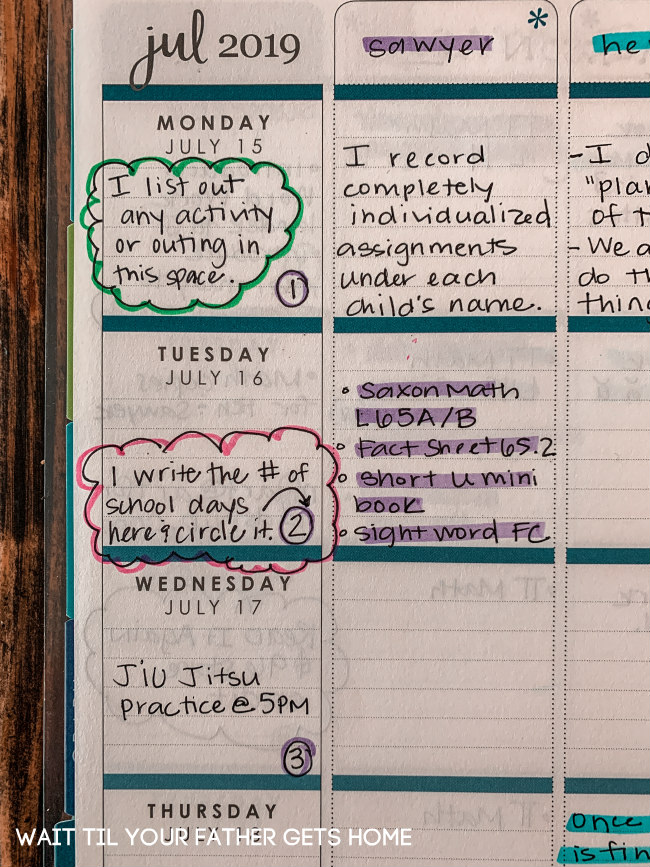
Each child gets a vertical column, and I list out their individual assignments as they begin working on them. Once complete I highlight it, showing it’s been finished. Since Sawyer and Henry do some work together, I tend to use the third column to show shared assignments between the two of them, so I’m not writing things down twice.
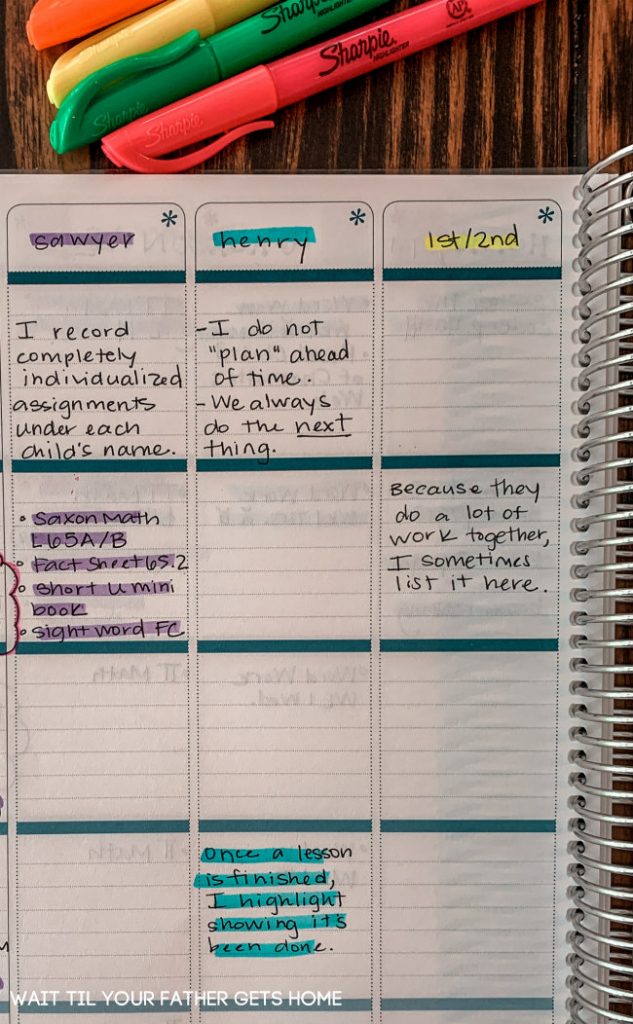
Also, I DO NOT PLAN AHEAD. Most of their work is just open and go, do the next lesson on the next day. I will look ahead for the week for science and history to see if I need to grab anything from the grocery store or order an item for a science experiment. Other than that, we always just do the next thing.
On the right side of the weekly spread, I keep track of Jackson’s assignments, our Science and History lessons for the week (remember, those are family subjects), and a running checklist for most of the pieces of our morning time. The far right column is my place to keep a to do list for the week, maybe a note of a blog post I want to publish, or anything else that comes to mind while we’re doing school.
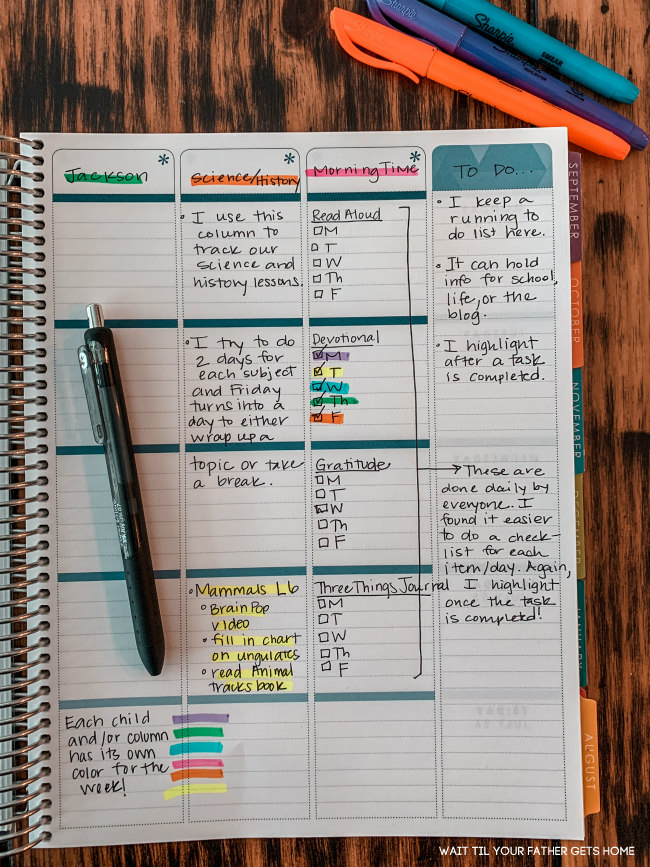
We alternate science and history lessons most weeks. I try to do two of each, sometimes three of one subject and two of another. It’s nice to break it up and not worry about covering both topics fully every single day.
Our morning time (which I will definitely go into further detail in an upcoming post) is usually a solid hour to an hour and a half. The kids have a couple of quiet, individual tasks they complete, they usually eat breakfast and have a chore or two as well. While they are working on getting their own things done, I read aloud, I read our devotional, we discuss our daily gratitude, and they write in their journals. Instead of writing all of those items out for each child, I just make a checklist at the beginning of the week and check/highlight once we’ve finished.
Every column ends up with their own highlighter color by the end of the week. I use the highlighters in the event that I write something down, but we don’t exactly finish it. Then I know the next day if we need to go back and wrap up any loose ends that didn’t quite get finished the day before.
A Completed Week
By week’s end, I have a fully written in, fully highlighted spread. I know what day of school we’re on, I know what each child has accomplished that week, and I know if I have any to-do’s that need attention.
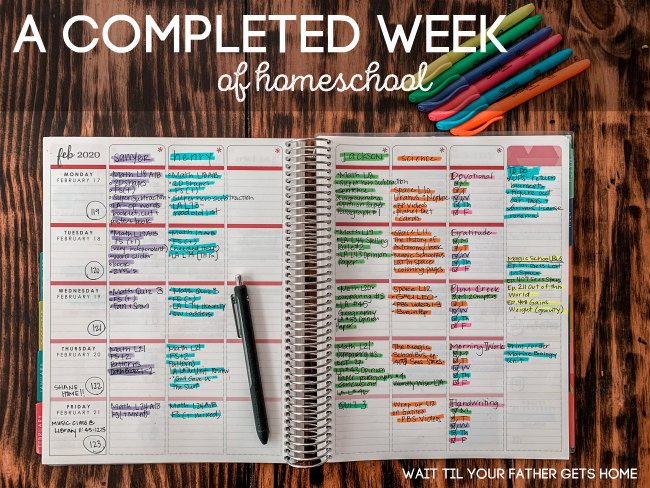
I do monitor my year at a glance every now and then to make sure we’re on track with the days in our school year. I also add and change curriculum lists as needed, too.
Of course, because I have an actual teacher planner, it has spots to keep passwords, subscription information, grades (if I choose to take any), and lots of other pages to take notes when needed.
More Planning Methods
There are so many other useful ways to plan out your school days, and you certainly do not need a teacher planner to stay organized. There was a time that I had a spiral notebook for each child, and I’d just list out their assignments that morning or even the night before. It worked well with my oldest because he was a strong reader, but it wasn’t so great with my younger two because they were still at the age of pre-reading. If you have older kids, this might be a great method though! You could also create assignment lists for kids on post-its, notecards, or individual dry erase boards. On our chore-heavy days, I make a post-it for each kid listing out what is expected of them by the end of the day.
Some friends I know use their calendars on their phones. This works for some, but it’s not my preferred method. I’ve always been a pen and paper planner.
I hope you found this helpful! If you have any other planning related questions, don’t hesitate to reach out or leave a comment below. As always, I’m happy to help.
Don’t forget to check out our curriculum picks for fourth, second, and first grade!


Leave a Reply